How to do velocity on capcut? An easy Step by Step Guide
Many users keep on asking How to do Velocity on CapCut? It is not a very complicated thing to do, rather a very easy one. You don’t need to have any special skill or expertise in Adobe video editing in this regard, just a basic knowledge is required on how to use CapCut. In the following blog, we’ll explore how to make velocity edits on CapCut without any problem.
But first of all, we should divulge into what exactly is velocity editing, and other basic questions;
What is Velocity Editing?
You must have seen a lot of viral TikTok videos in which the video suddenly slows down or its speed increases at once. The speed of the video is tricked to deflect the normal speed to create fascinating and trendy TikTok videos. Slowing down or speeding up videos at certain points is called velocity editing.
Who uses Velocity Editing on Capcut?
This kind of editing is used for various kinds of videos. People who make dancing videos apply velocity editing tools to enthrall the viewers, especially if they want to highlight a particular dancing step. Along with them, youtubers who stream online games can also use this technique to highlight some events, for example, killing of an opponent, a level completion / upgradation moment. Such moments can be slowed down to make the video fascinating and emphasize the importance of the moment.
Also, those moments of the video which are unimportant or have tiny implications on the viewers, can be sped up to save time and ensure that video doesn’t get boring. For example, if you are a daily vlogger, and you are filming yourself having a meal in a restaurant, you can speed up this part of the video because obviously no one wants to stare at the screen to watch someone having a meal for 10- 20 minutes constantly.
Application / Benefits of Velocity Editing
As mentioned earlier, there are benefits of doing velocity on CapCut. This tool is used to highlight the important parts of the videos and limit the duration of those moments which have low viewership expectancy. Those moments which are needed to be highlighted, can be slowed down to create a dramatic effect and focused viewership.
And those moments, which are of little significance can be sped up. Also, in some instances, speeding up a video can also create an interesting impact on the video. For example, when editing a fighting or chasing scene, the speed of the video can be increased to depict an intense fighting, while the actual fight may have been recorded at a much slower speed.
The discretion lies entirely with the users to decide where to slow down the video and where to speed it up. Velocity editing tool in capcut is there to assist them.
Along with the above mentioned usages, velocity editing techniques can be used at various other instances according to the need of the user. Many users have no idea that velocity editing in CapCut is very easy. In the following article, we will dive into velocity editing in CapCut.
Velocity Editing on Capcut – Step by Step Guide
Rather than just posting basic points, we have prepared this step by step guide with screenshots for the users to easily grasp how to do velocity on CapCut.
Step 1: Open CapCut App
Open the CapCut app from your phone. If you haven’t installed it yet, first you have to download CapCut Mod Apk.
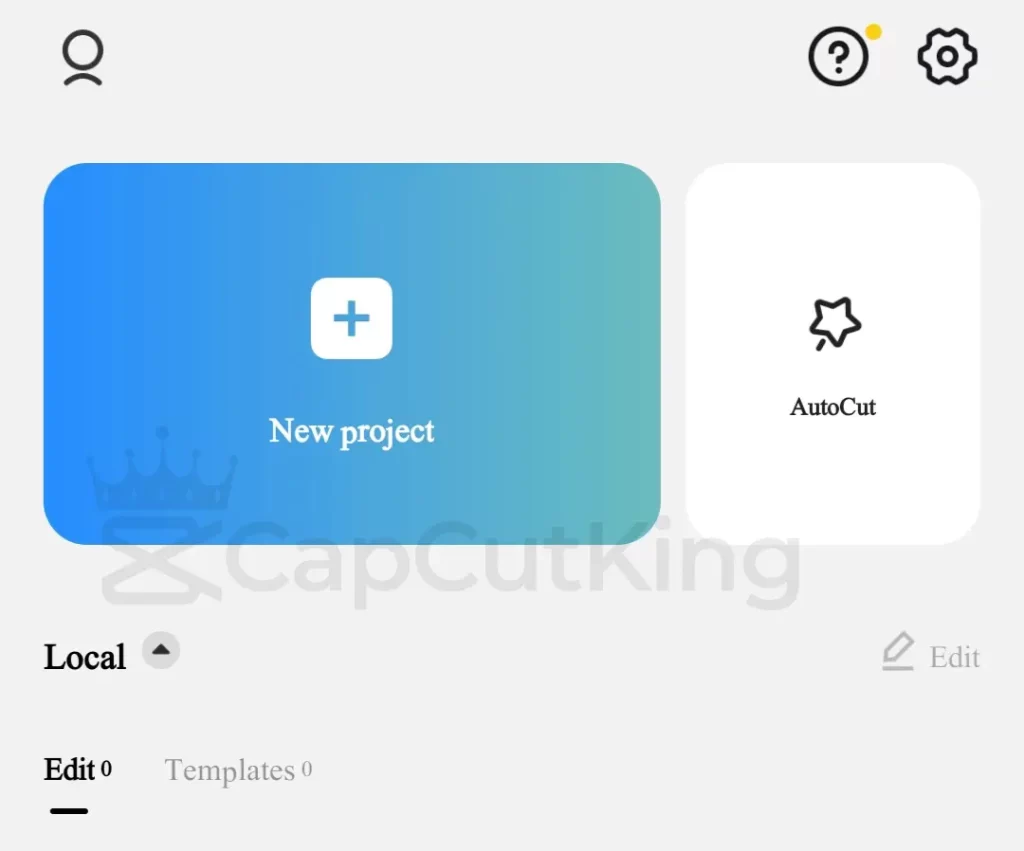
Step 2: Add New Project
If the video on which you want to apply the velocity editing tool has already been added to your CapCut app, it will be displayed on the main screen. But if you haven’t added the video before, click on the New Project.
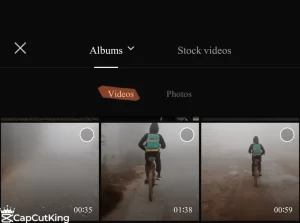
Step 3: Add New Video
You will now have to choose the video from your phone’s gallery on which you want to apply this effect. At this point, CapCut may require permission to access your gallery, grant this permission, and select the video.
Crop the video or Add in CapCut
Once you have selected the video, it will start playing the video and you will be able to see its preview. You can crop the video by selecting the Crop option from the bottom left of the screen. Click on ADD at the right bottom of the screen once you are done.

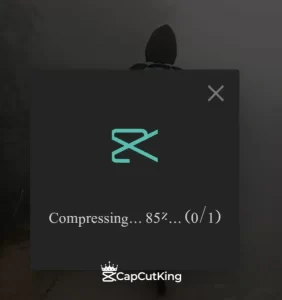
Once you choose to add the Video, CapCut will start compressing the video. Let it compress the video for smooth video editing.
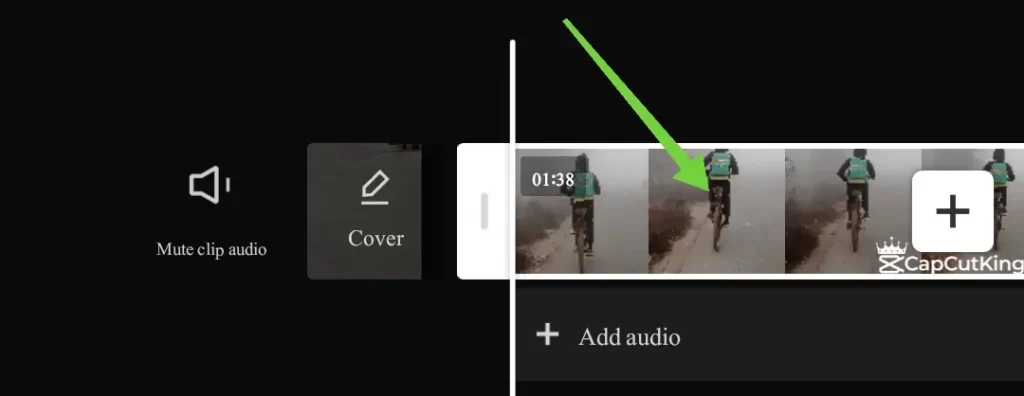
Step 4: Select the Video Layer in CapCut
Now CapCut will take you to its main video editing interface. As depicted in the picture below, select the layer that represents your video.
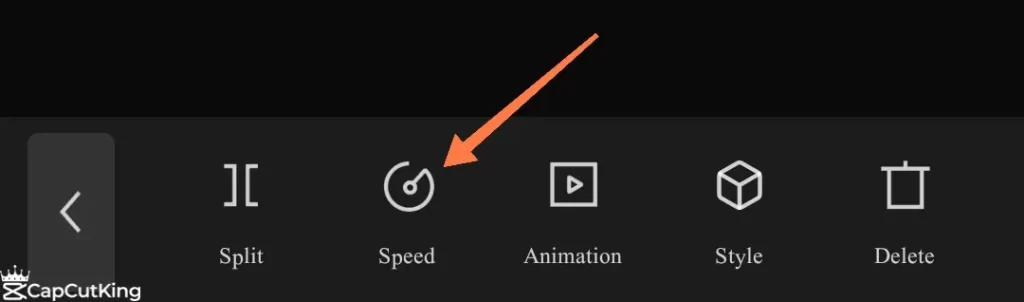
Step 5: Tap on the Speed Button
Once you have selected your video’s layer, numerous video editing options will be displayed at the bottom of the interface. Tap on the Speed button from the toolbar to make velocity changes.
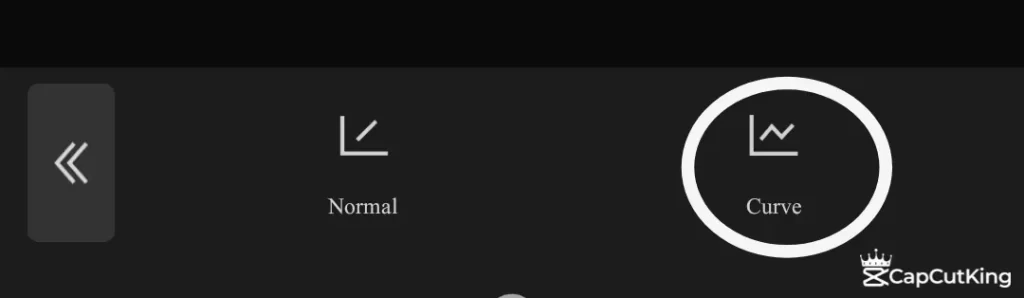
Step 6: Normal or Curve Speed Editing in CapCut
Here you will be presented with two options;
- Normal
- Curve
Both of the above mentioned options are explained hereafter.
Create a Smooth Slow motion video:
Once you click on the Speed button, you will be required to choose between either the Normal option or by Curve method. You can create a smooth slow mo video by tapping the Normal option.
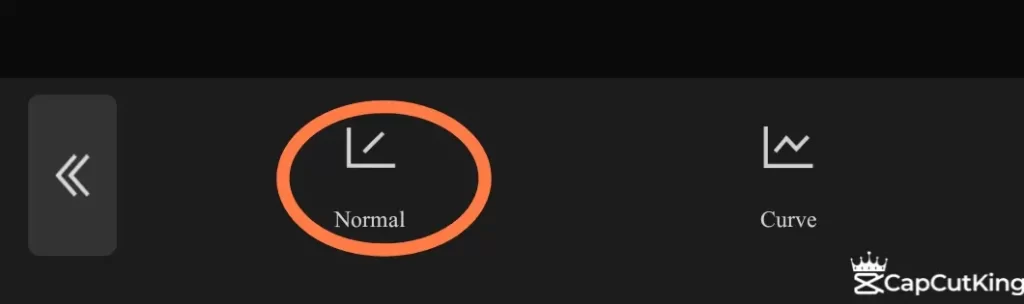
Step 7: Tap on the Normal Speed editing
Tap on this option to smoothly slow down the entire video. This option will slow down the entire video at the same rate, without any fluctuation.
Choose the scale of speed
Once you tap this option, you will have to choose at what scale you want to slow down the video.
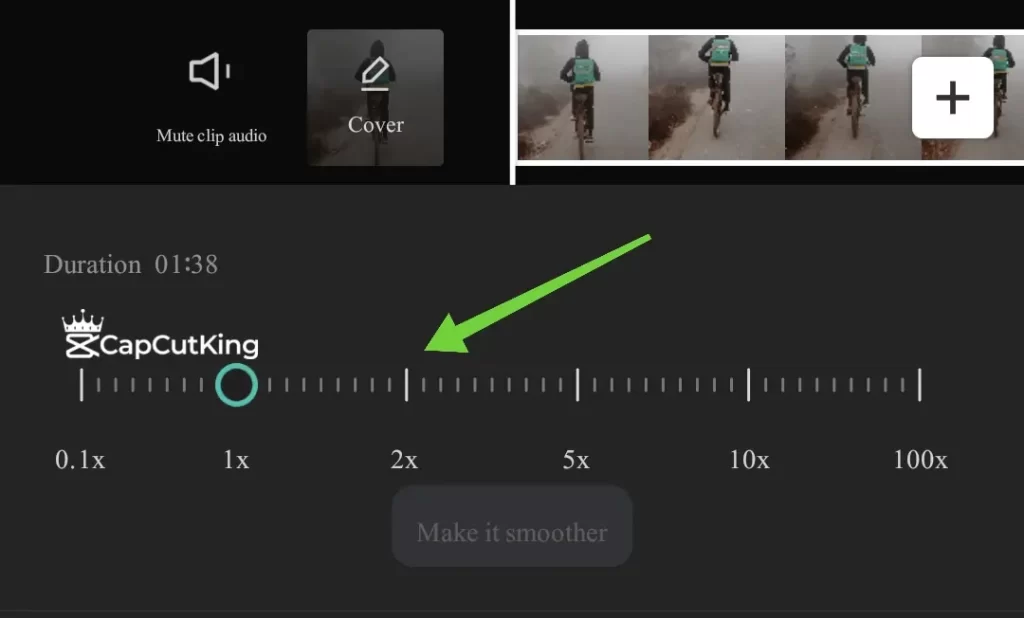
You can choose the scale from 0.1x to 100x. Once you choose a scale, you can play the video to see the effect of your choice. Try different scales and finalize the one that suits your requirements. After that you have to select the resolution and frame rate of the video from the top right corner of the screen.
Changes in Video duration:
Once you alter the scale of the speed of video, the same will be reflected in the duration of it. For example, if you make a slow motion video, it means that the duration of the video will be increased. But, if you increase the speed, the duration will be decreased. In the following screenshot, you can see that we increased the speed to 5x and the duration is decreased by five times, decreasing the duration of a video from 01:38 to 20.9 seconds only.

Step 8: Adjust video Resolution
Tap on the button shown in the following image to easily change video resolution in CapCut.
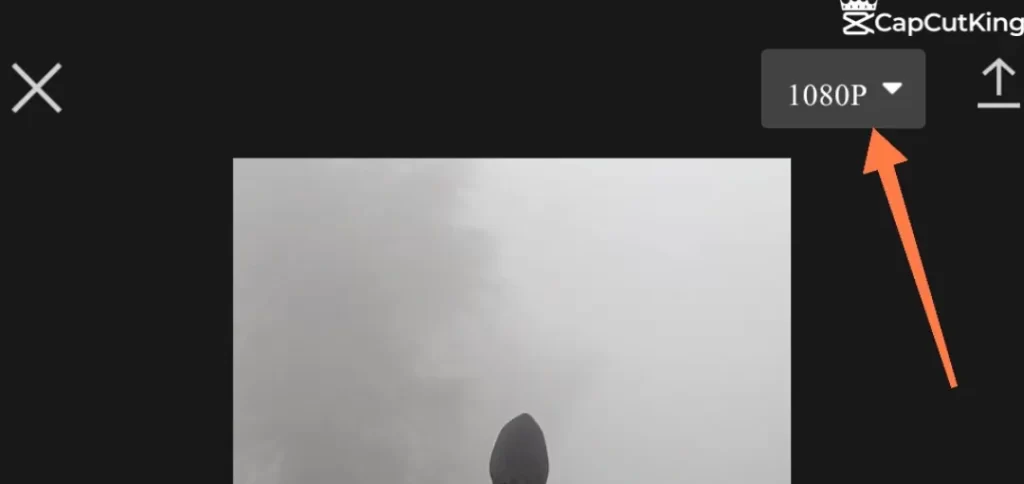
You can choose resolution from 480p, 720p, 1080p or 2k/4k resolution options. 480p resolution will generate the lowest quality of the video while the quality of 2k / 4k will be the highest but it will also consume a higher amount of memory. For most of the users, 1080p is the most ideal and recommended video resolution quality.

Step 9: Adjust Video Frame Rate
Frame rate is also an important feature in video quality. You can choose frame rate from 24 to 60 frames per second. 24 will be the lowest quality and 60 the highest. As mentioned earlier, choosing the higher quality will consume more mobile memory. A majority of the content creators choose 30 frames per second for videos.
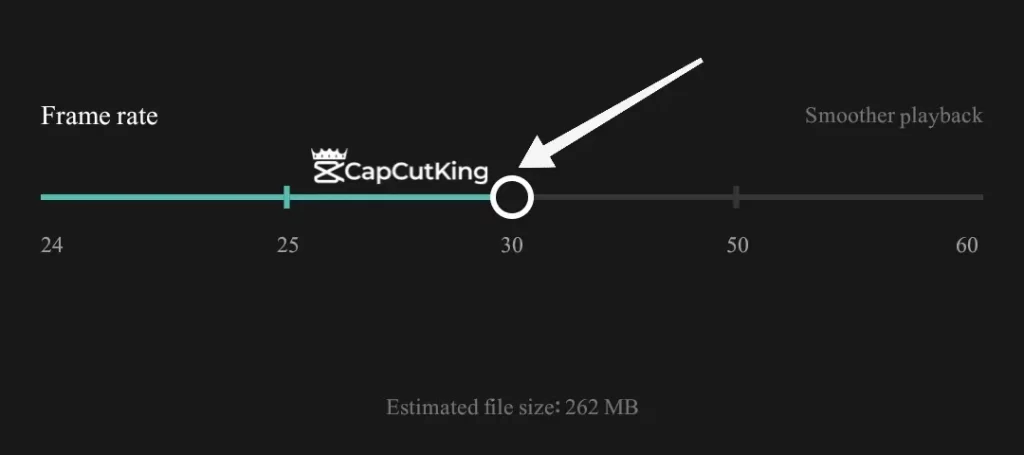
Estimated File Size
Just below video frame rate in CapCut, you can observe the estimated file size of this video. This estimated file size can vary depending on Video resolution and frame rate. Higher the Video Resolution and Frame, higher the file size of the video will be, and vice versa.
Once you are done with it, you may now click on the export option to save the copy of your edited video. Isn’t it quite easy to do velocity on CapCut?
Make Velocity on Capcut with Curve Method
The other velocity editing option in the Speed option is the Curve option. With Curve Speed Editing, you can increase the speed of some parts of your video, and decrease the speed of some other parts of the same video. Tap the Curve option in the Speed menu.
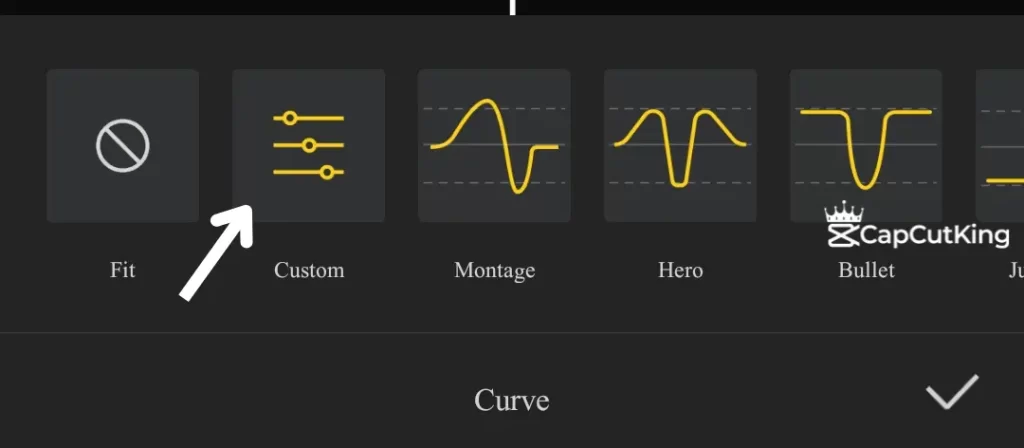
You will see many velocity editing presets e.g.
- Montago
- Hero
- Bullet
- Jump Cut
- Flash In
- Flash Out.
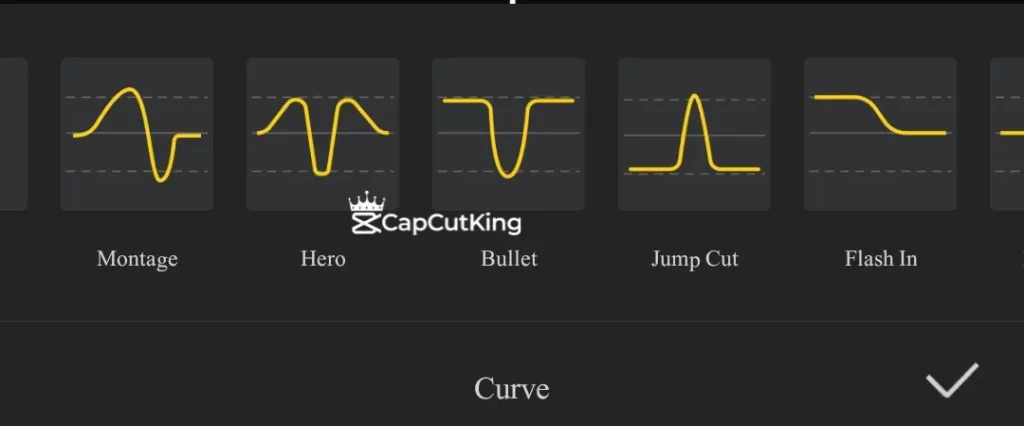
You’ll also see some diagrams above these presets which depict how the velocity of the preset will work. If you think one of these presets matches your requirements, you can simply choose it, and your work is done. But If you want to make custom editing in the velocity, tap the Custom Button.
Once you have tapped the custom velocity edit button, you will once again have to tap it for custom velocity editing.
Step 10: Custom Velocity Editing in CapCut
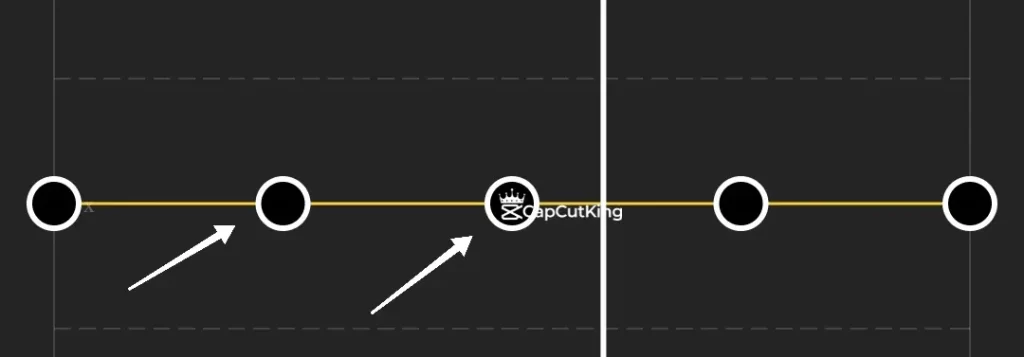
Once you are into editing the custom velocity, you will see a line with dots in a rectangular. Dots on this line are called BEATS in CapCut.
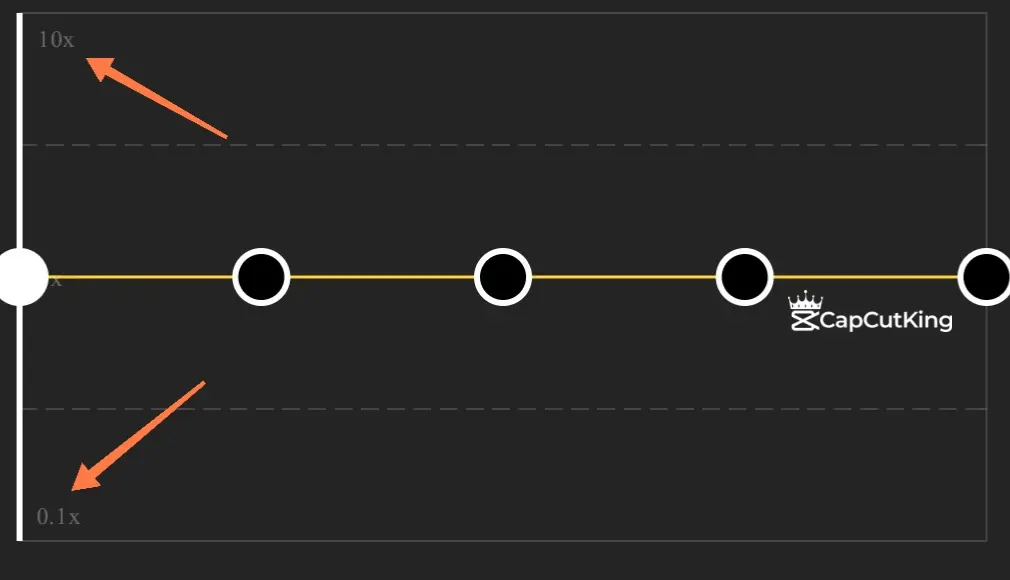
The lower end 0.1x of the rectangular means that if you drag the dots to 0.1x, at that point it will slow down the video by 10 times that original speed. And the top line of the rectangular is 10x which means that if you drag the dot to 10x, video’s speed will be multiplied 10 times of the original speed.
Add beats to edit Speed of the video
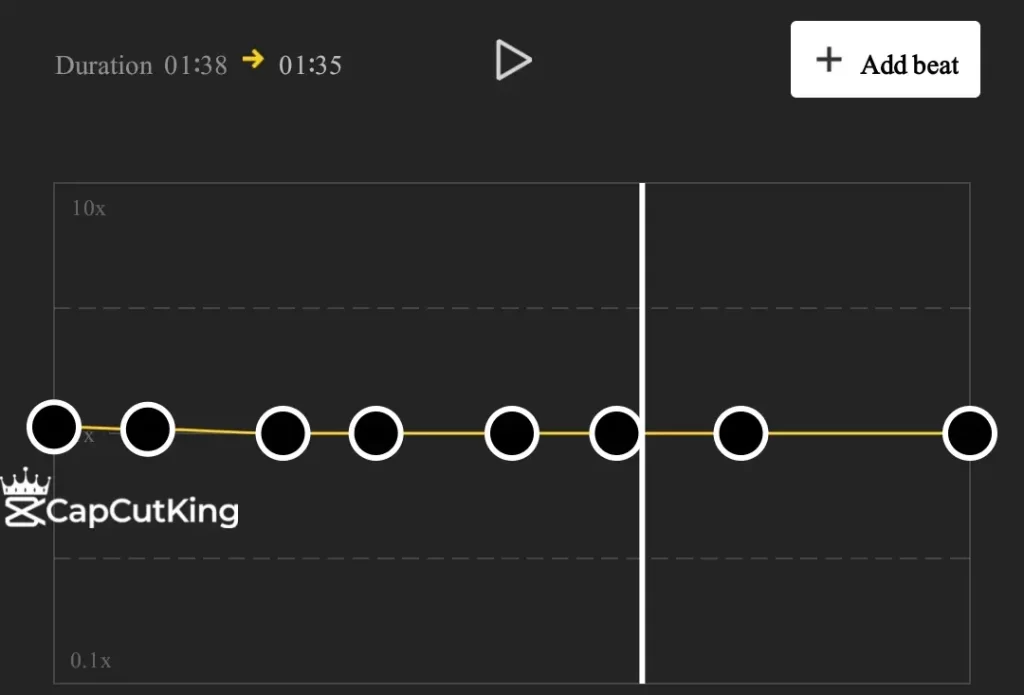
At first, you will only see 5 round dots which means that you can fluctuate the velocity at only five points in the video but if you want to add more points to alter the speed of the video, you can simply hit the Add Beat option at the top right corner of this rectangular. You will see a new dot, and you can add as many dots or velocity editing points as you want. In the following screenshot, we chose to add a new beat between first two beats.
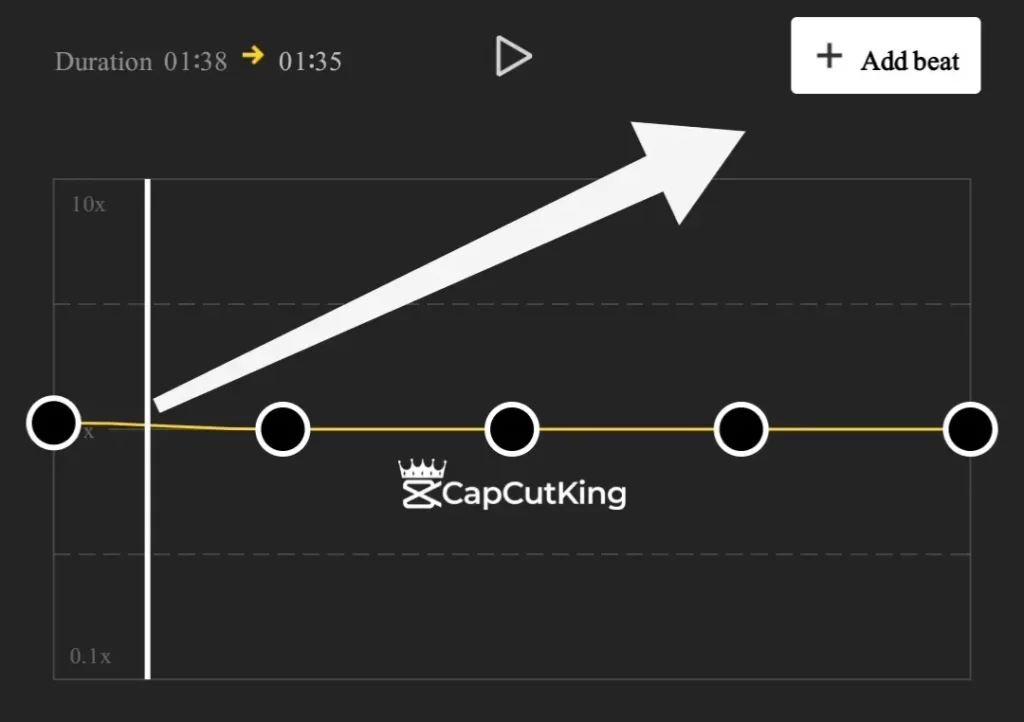
As you can see in the following image, we have increased the number of beats from five to eight.
So, you have to adjust the dots to make your required velocity setting or, so to say, adjust the beat. You can also hit the play button to see the preview of the changes that you have made. Following is the screenshot of the way we have adjusted dots for velocity edit.
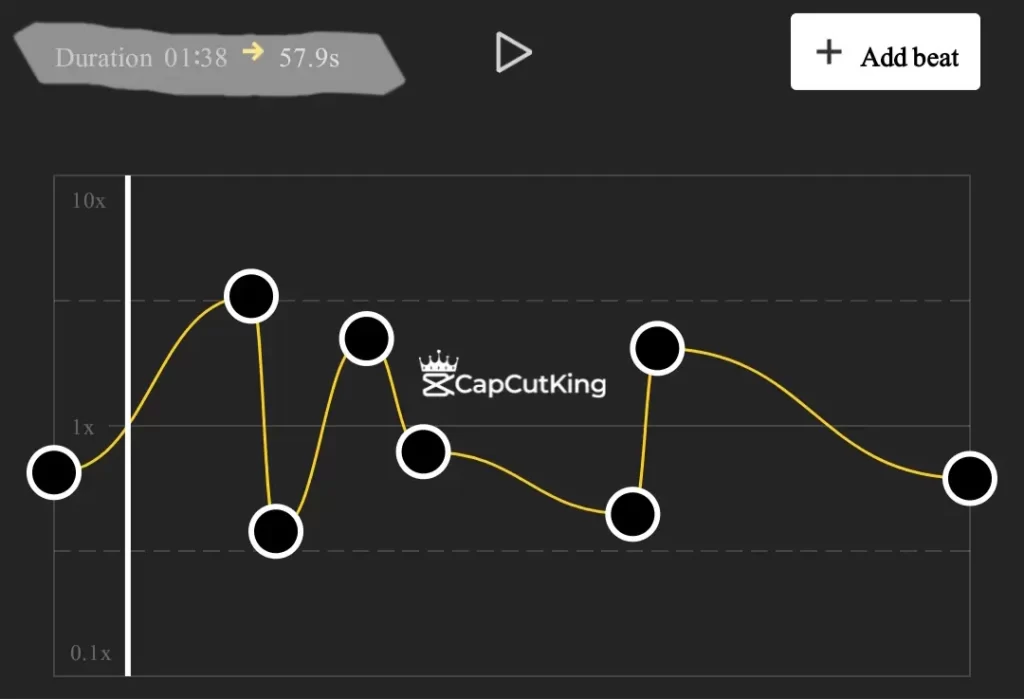
As you can see in the screeshot that although, at some points, we decreased the speed of the video, overall the speed has increased resulting a decrease in the video duration as mention at top left corner of the screenshot attached above.
Impact of Velocity editing on the Sound
If you are talking in the video, the same effect of velocity editing will also apply on the sound automatically, unless you add the audio or music externally. For example, the sound of the audio will speed up at the points where you have increased the speed of the video, and at those points where you have dropped the dots to decrease the speed, the same effect will apply on the sound of the music as well.
You can hit the Reset button at the bottom left corner to undo all the changes and bring the video to normal. Once you are done with editing, just tap the right tick at the bottom right corner of the screen. This will bring you to the main Curve option, hit the right tick again to go back to the main screen.
Phew!! You are done with the velocity editing, now if you want to do so, you can apply other effects on the video, or simply save the video from the top right corner. Good Luck with the viral video!
Velocity Editing According to the Music Beats
Rhyming musical beat with the video was a headache for the content creators before they had the opportunity to do velocity on CapCut. With the help of this feature, video’s speed or its velocity can be modified to exactly match the music beats. That’s exactly what we’ll explain in the following passage.
Match Cut in CapCut
One way of rhyming music with the video is the use of the Match Cut in CapCut. We assume that you want to add another music or sound beat. Just below the layer representing the video, you will see the option of Add Audio.
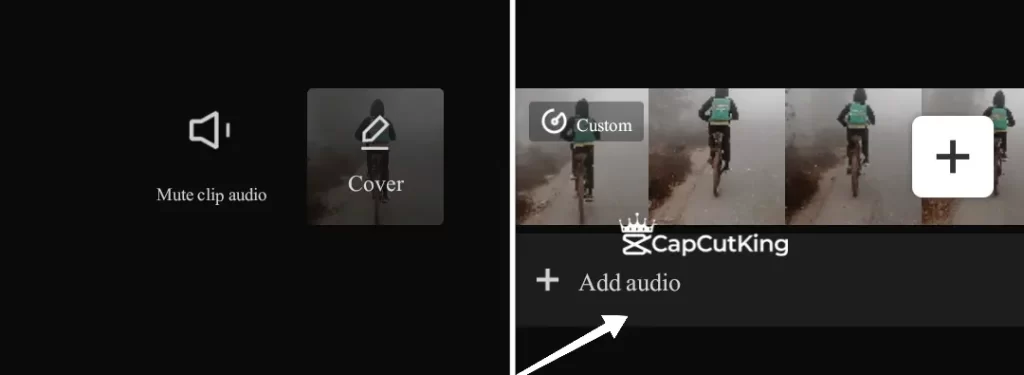
Tap this option and choose from the menu of Sounds, Effects, Extracted and Record. Once you have added the sound, tap on the sound / audio layer.
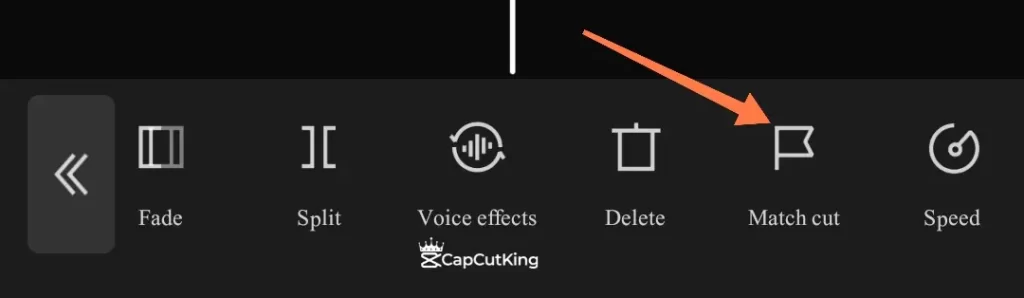
Select Match Cut from the menu.
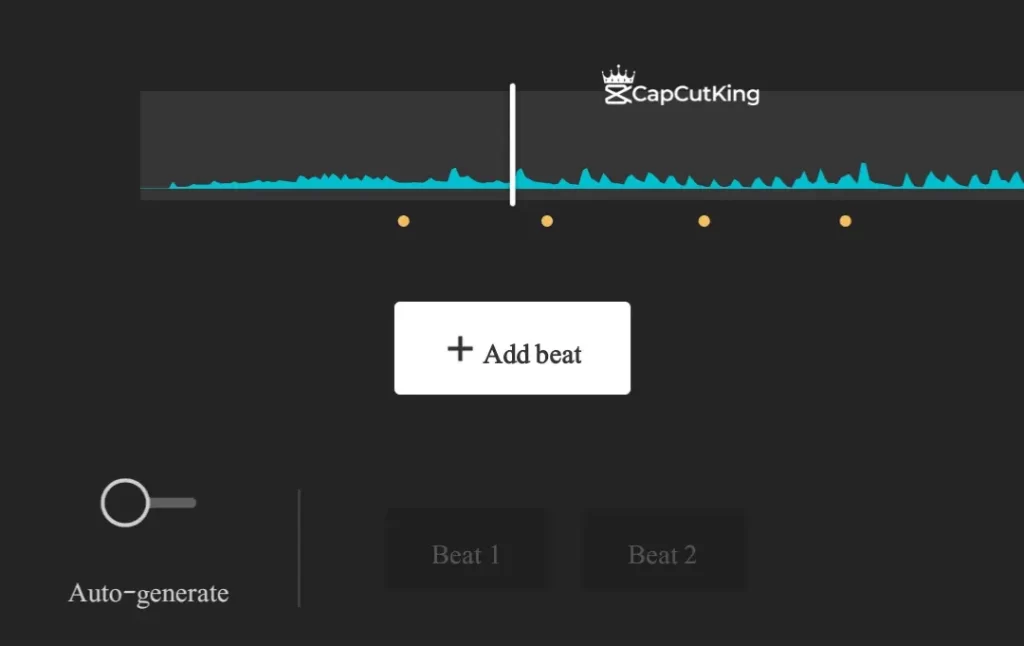
You have two options here. Either let the CapCut AI to auto Generate beats or add the beats manually.
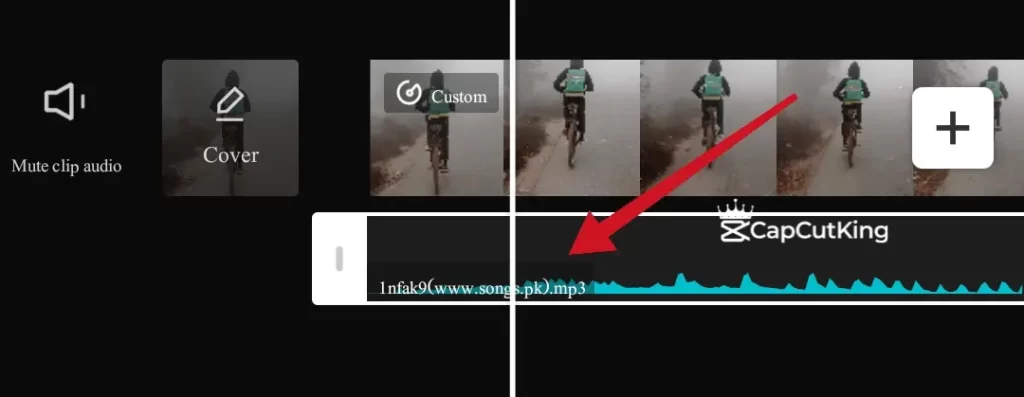
If you want to manually add the beats, play the sound, and add beats at every highest volume point in the sound, or the lowest point, depending on how you want to sync video with the background audio. You can see in the image below that we have added four beats.
Now, go back to the main menu. Here you will see dots appearing below the audio, these dots depict the points where you have added beats.
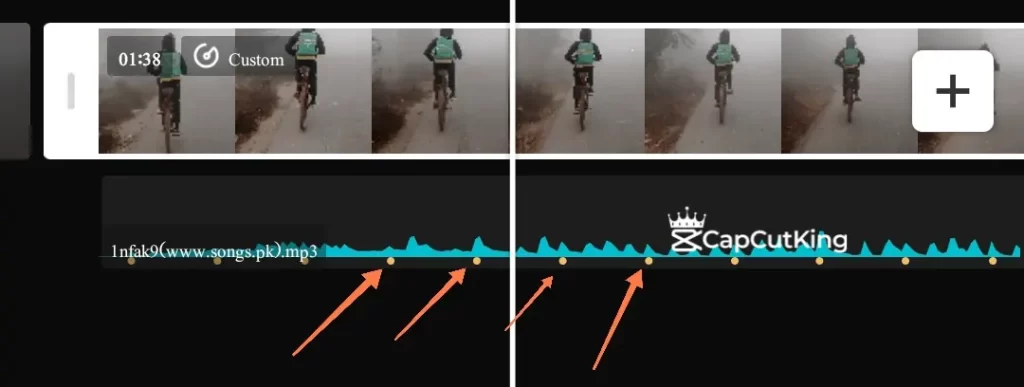
Now split the video at every beat, and adjust the speed of the video according to your requirements.
In this way, you can easily rhyme or sync your video / audio according to the background sound / music.
Final Verdict
Editing Velocity in Capcut is very easy. It adds a very saucy flavor in the video. You can easily and smoothly adjust the speed of your video without any complicated method. Its as simple as reading this passage.
Frequently Asked Questions:
Here are some of the frequently asked questions regarding velocity.