How to blur on CapCut? Super easy guide
Among the many useful features that make CapCut a professional software for video editing, blurring is the one. CapCut allows creators to bring any specific part of the video or photograph in-focus by making other elements out of focus. If you didn’t know how to blur on CapCut, with this easy guide, you can blur and unblur a photo, video or any portion of your content on CapCut very easily. Content creators around the world must be thankful to ByteDance for making their lives easy.
CapCut is the video editor’s choice to blur videos with unlimited options to give your content an imaginative touch. It is a free video editing app available for ios android devices. Compared to other video editing tools adding a blur effect on CapCut is effortless.
How to blur on CapCut? (Complete Video)
Below is the step to step guide to blur on CapCut, and to make that part of the video out of focus what you don’t want the audience to see. This article will also guide how to blur a part of the video and the face of a photograph.
Here is how you can do it.
1. Open CapCut from apps on your phone
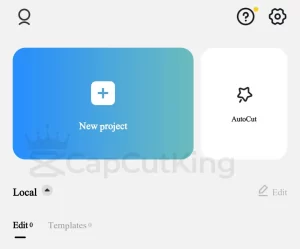
2. Click the ‘+ New Project’ option on the homepage. It will lead you to Gallery.
3. Select the video you want to edit/blur
4. Proceed with ‘Add’ on the bottom right to upload the video
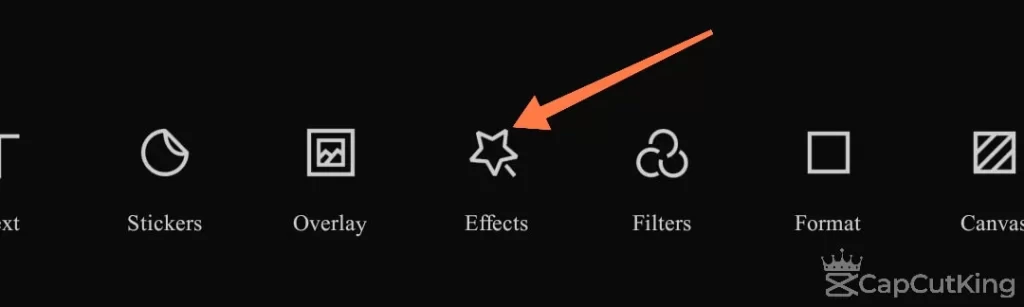
5. Tap the ‘Effects’ option from the bottom menu
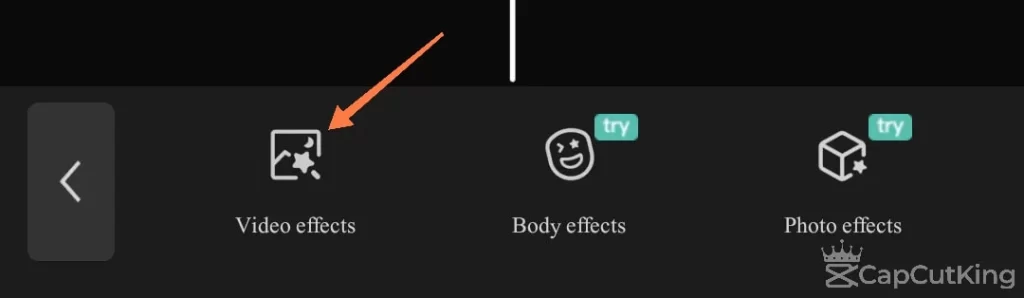
6. Choose the ‘Video Effect’ Option.
7. From the video effect menu go to the “Basic’ set of effects
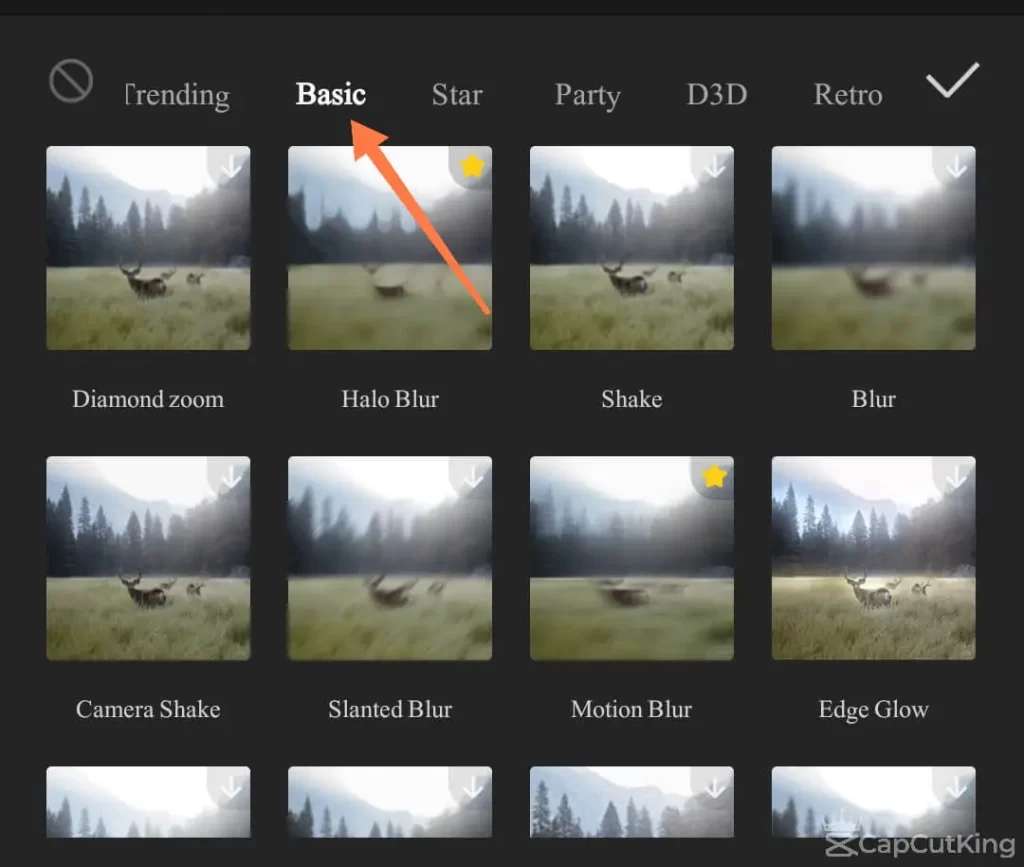
8. Select the ‘blur’ effect from the given options. For example, we chose Halo blur.
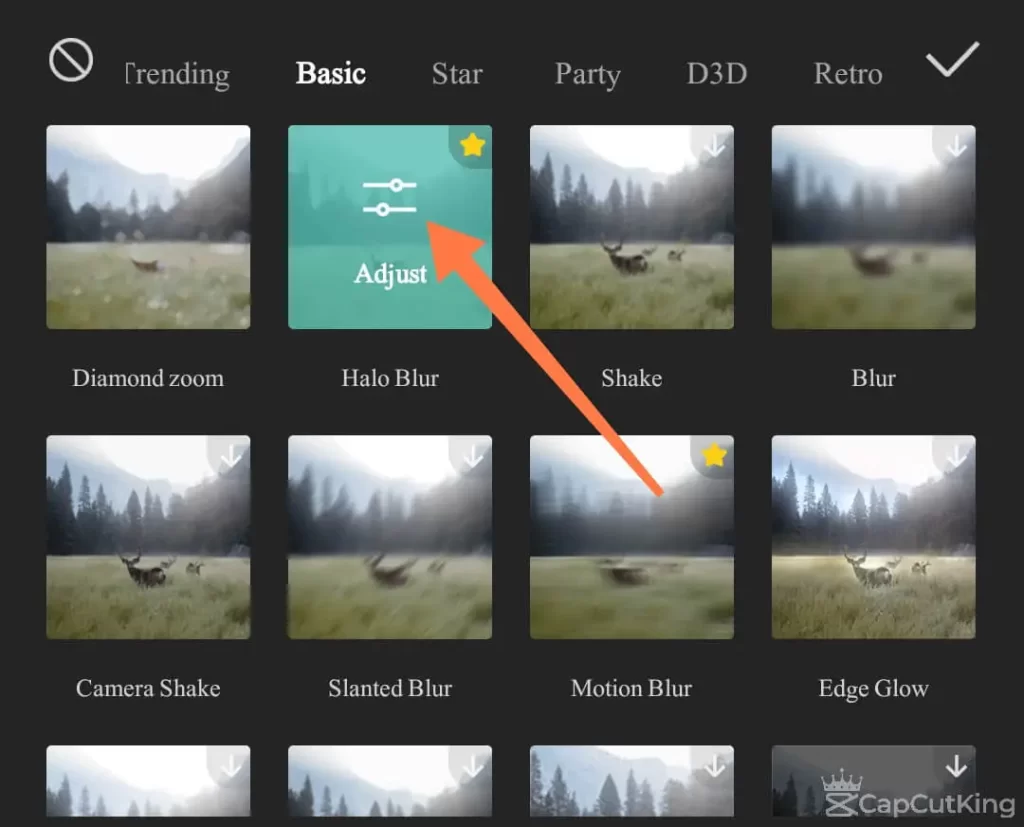
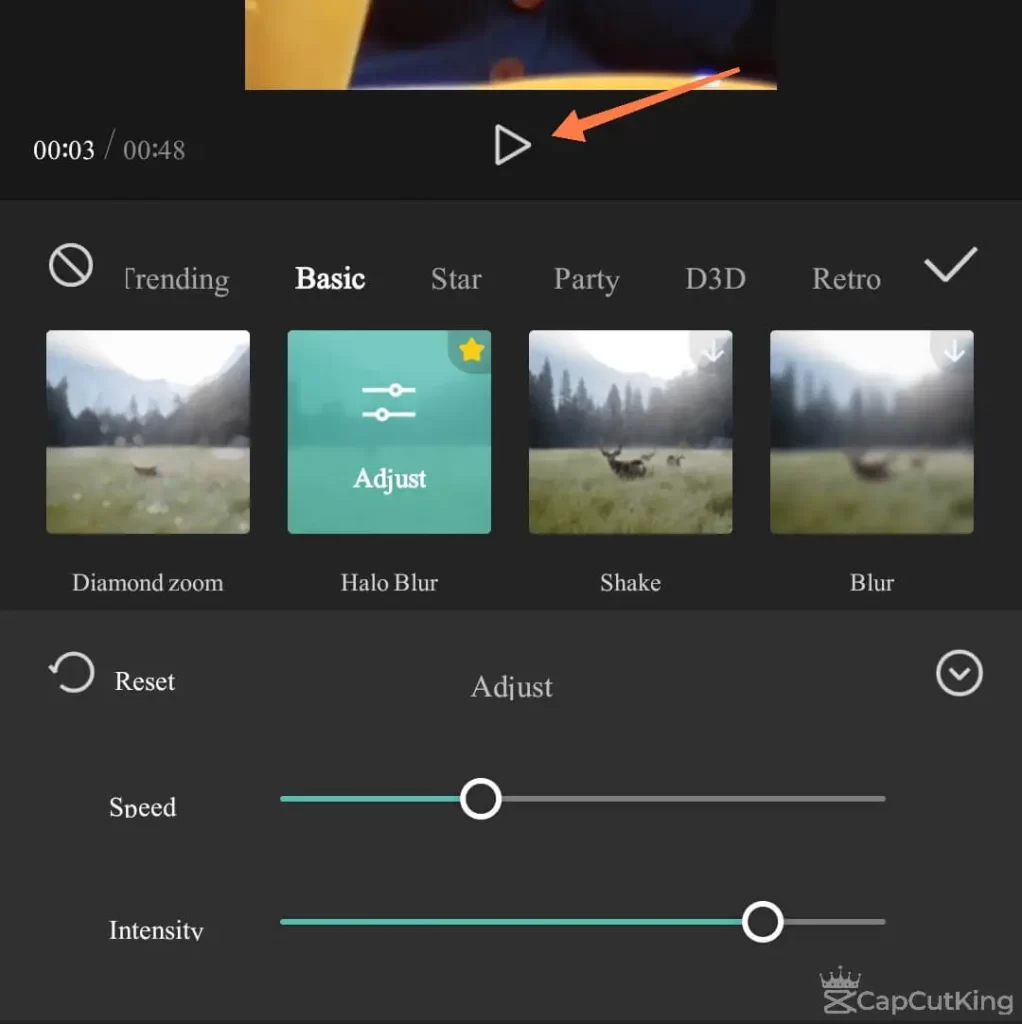
9. Press the ‘Adjust’ to vary the intensity of the blur effect.

You can adjust the speed and intensity of the blur effect.
Go back to “Effects” tab and you will see that a slider has appeared below your video layer. You can use this slider to increase or decrease the duration of blur on capcut.

Once you are done, your video is ready. But before you download it into your Gallery, make sure to have a final look at it.
10. Play the video to check if you have done it right.
11. Your video is ready. Export it by clicking on the upper-right ‘download’ option.
Accomplished! That is how you can blur on CapCut very quickly and choose the degree of intensity a per your requirement.
How to blur a part of Video in CapCut?
Definitely anyone will use this effect only on a certain portion of the video instead of blurring out the complete content. Applying this filter on a specific part of the video is piece of cake.
To edit any section of the video, follow these steps,
1. Make sure that you are in CapCut app.
2. Launch the ‘New Project ‘option available on Home Screen, and add your desired video.
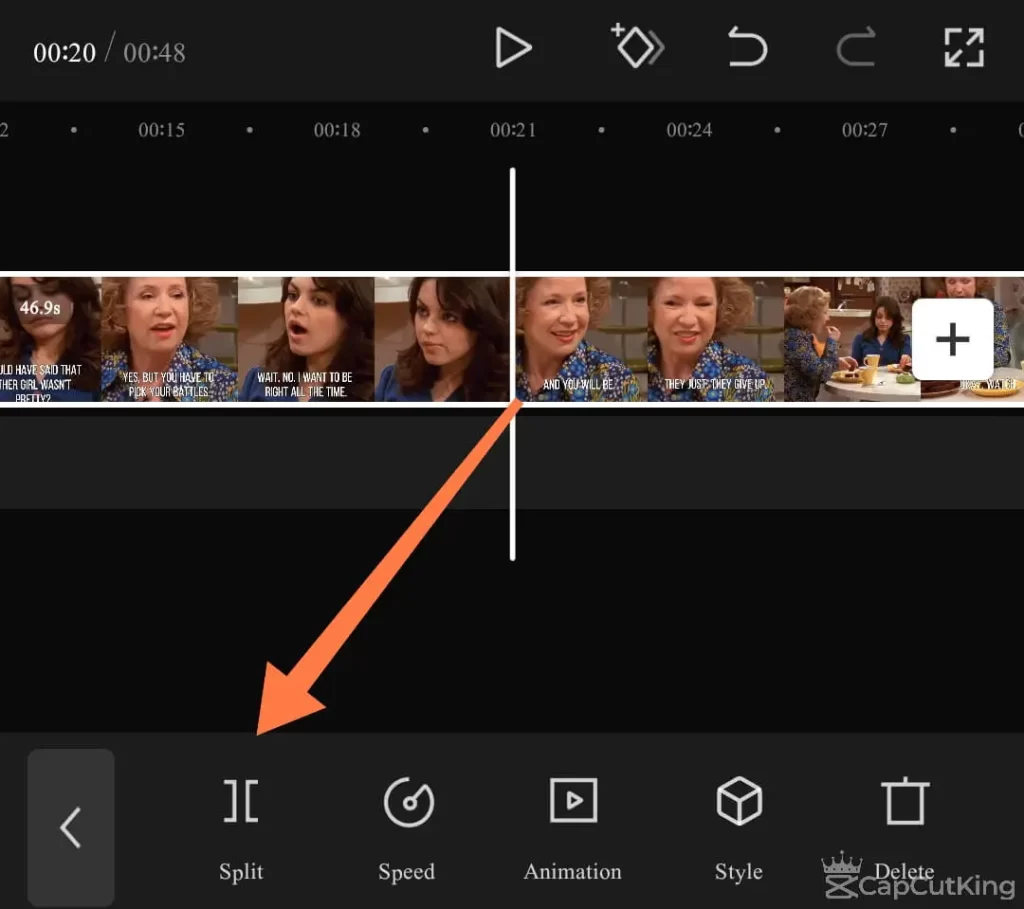
3. At the starting point of the part of the video you want to blur, select “Edit.’
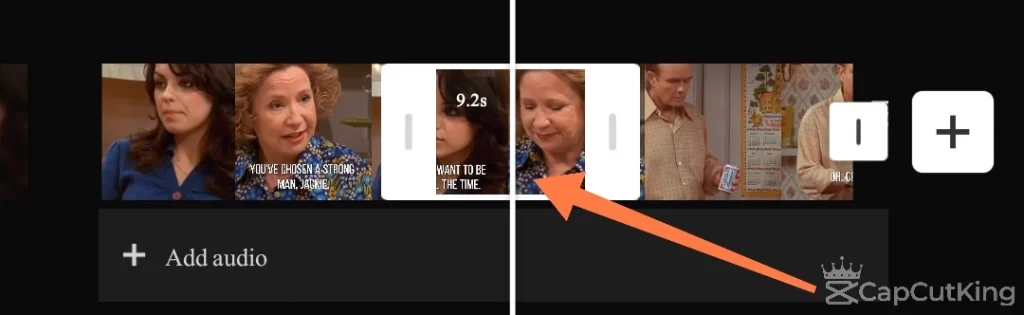
4. Now split that clip of the video that you want to blur. For example, we want to blur from 00:21 seconds to 00:30 seconds, we will first press the split button at 00:21 seconds and then at 00:30 seconds.
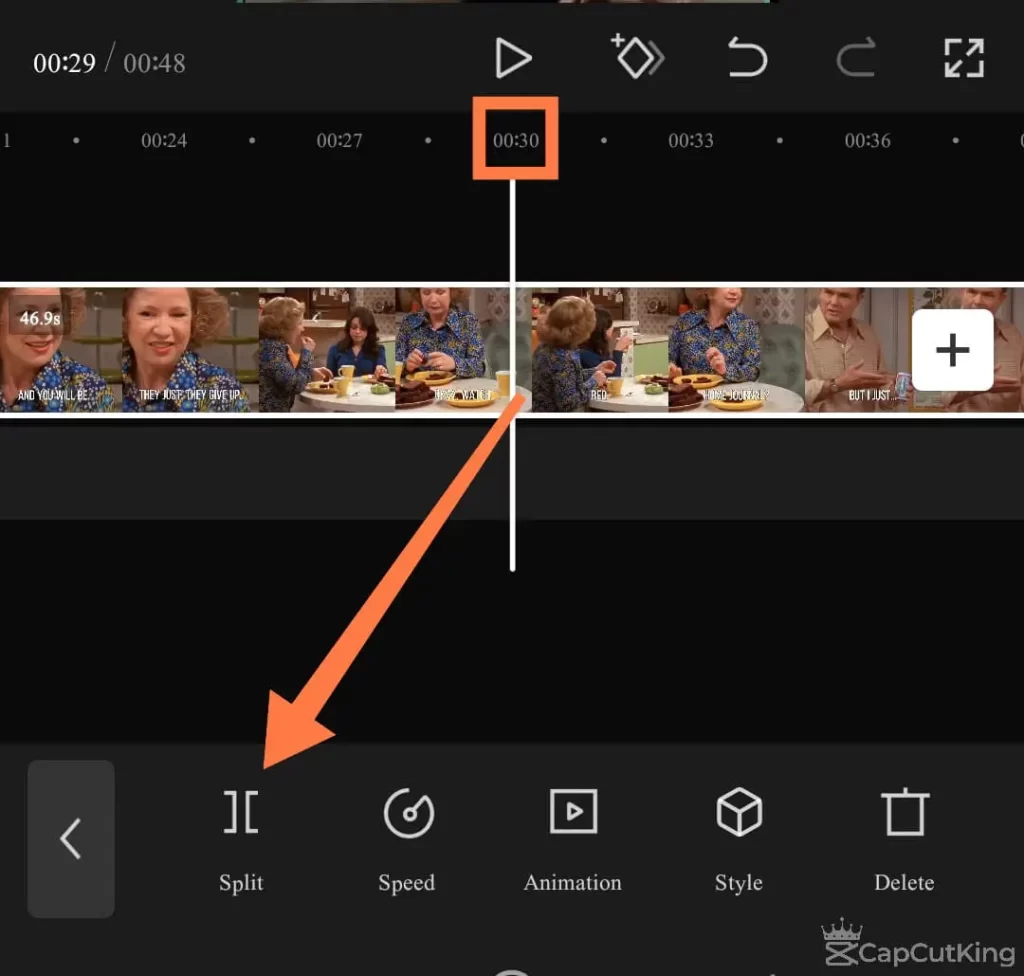
Now when the portion of the video that you want to blur is split, it is very easy to process. We’ll go back and notice that now there are three parts of the video. Tap on the small clip that you have just split from the complete video.
5. Return to the previous set of tools and choose “Effects” from lower panel.
6. Click on ‘Video Effects.’
7. Go to ‘Basic’ effects category.
8. Find ‘Blur’ effect and tap on it. A slider will show up below your video which we used in the previous method to adjust the duration of the blur.
9. Move the slider to the video section that you just split
10. Drag the handlebar, and adjust it according to the split clip’s duration.
11. ‘Adjust’ the intensity of blur effect to make smooth transition
You have just blurred the required part of your video effortlessly. When you are done with editing your video, it is always wise to play the video to confirm the final touch.
12. A ‘Download’ option on the upper-right corner will export the video into your gallery.
Completed! Have you noticed how easy it is to blur on CapCut? You are done with blurring a part of video of your choice. Now share it on any social media platforms like Facebook, Instagram and TikTok and get the desirable reach.
How to blur an Object on CapCut?
Sometimes you don’t want to show the face of someone in video to respect their privacy, or hide any product or any object. CapCut brilliantly addressed this issue by introducing a feature to blur the object in video. Here is how you can get the advantage of this and blur any object of your video.
After Launching the CapCut App, select and ‘Add’ the video from your gallery.
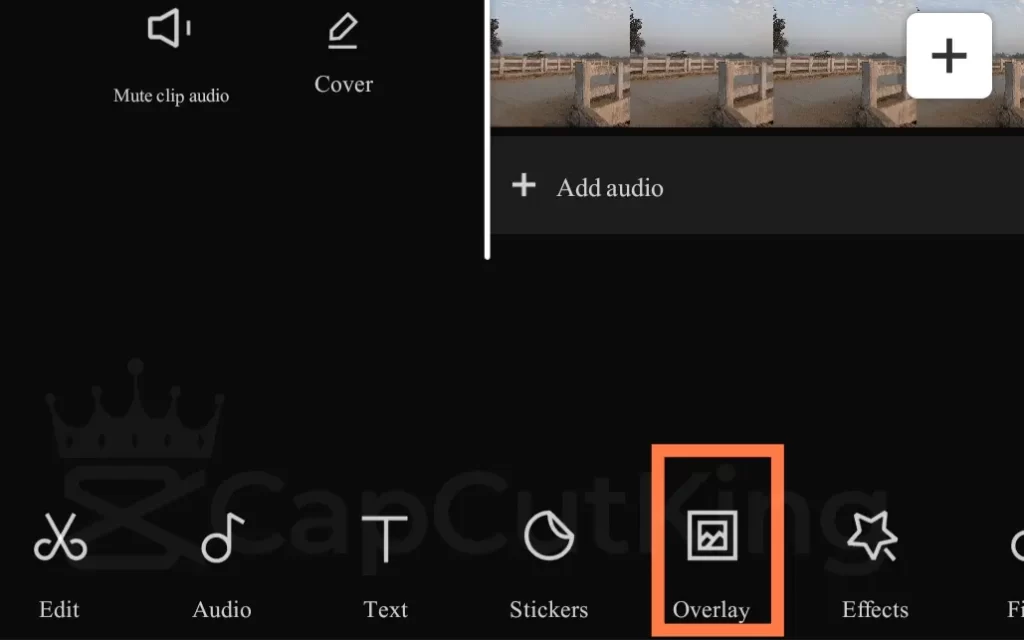
13. Find the ‘Overlay’ option and click on it. You can navigate it near ‘Effects’ in the bottom editing panel.
14. Tap ‘Add Overlay’. It will take you to the Gallery. ‘Add’ and ‘Select’ the same video again.
15. Just confirm that the duration of the overlay is the same as the duration of the first video.
16. Go back to the main editing menu. Select ‘Effects’ and tap ‘Video Effects.’ A wide range of effects will show up on the screen.
17. Locate the ‘Basic’ effects Category.
18. Tap the ‘blur’ effect and drag the slider to the required duration of the video.
19. Fine-tune the intensity of effect from the ‘Adjust’ option.
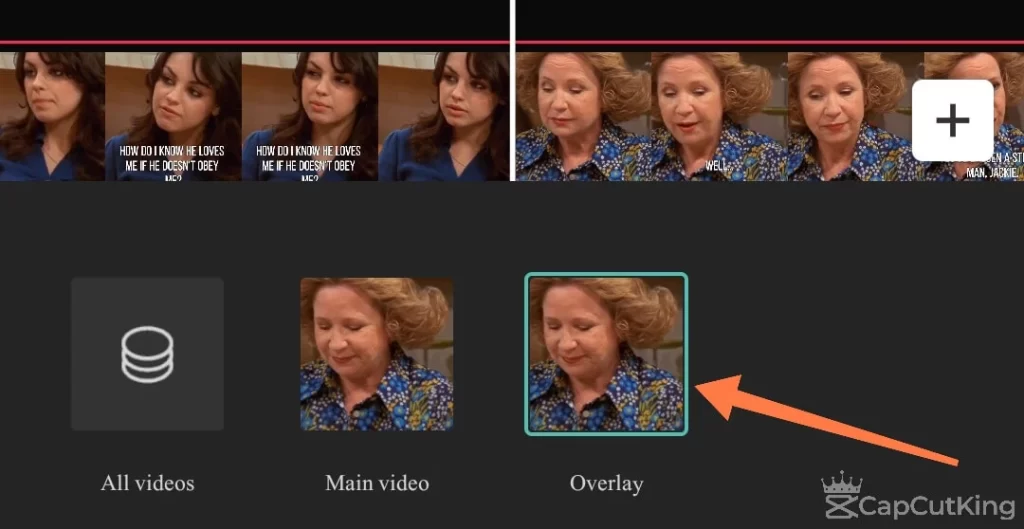
20. You will see an ‘Object’ control on the bottom.

21. Select your object video. For your convenience just keep your Overlay Video as the Object. For example, as displayed in the image below, second layer depicts the overlay video in capcut.
22. Move back to the ‘Overlay’ option and select it.
23. Slide left the list of controls and navigate the ‘Mask’ command.
24. Tap ‘Mask’ and you will see different shapes appearing on the screen.
25. Select the type of the ‘Mask’ according to the object you want to blur.
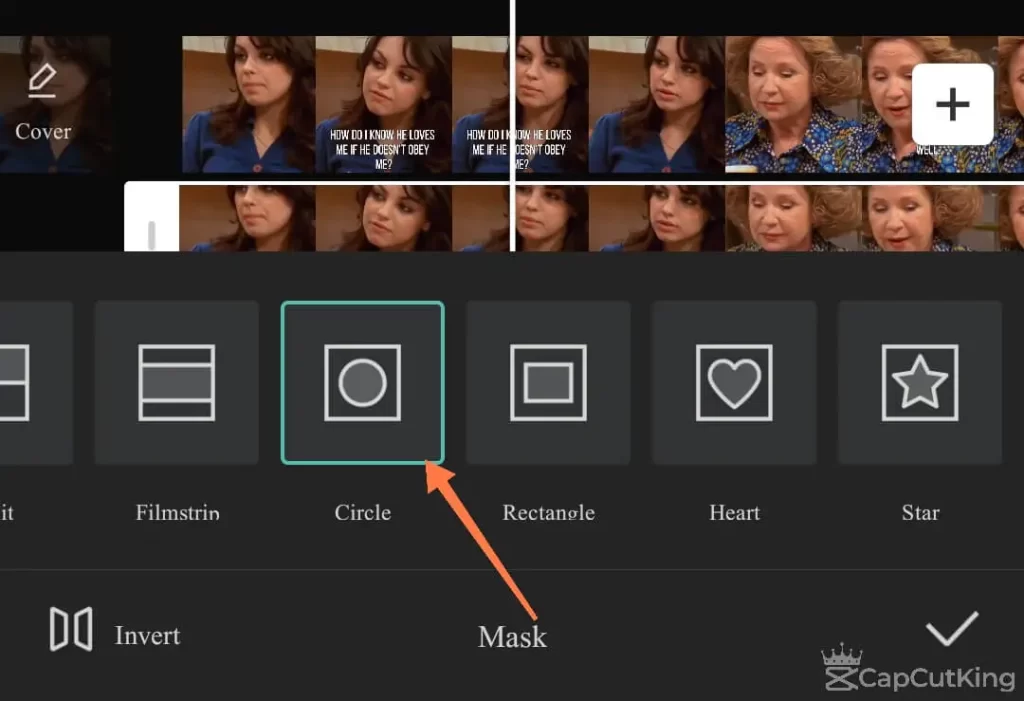
26. Position the selected ‘Mask’ shape on face or object you want to blur and it will be blurred. For example, we wanted to blur the face in the video so we adjusted a circle mask at the face.
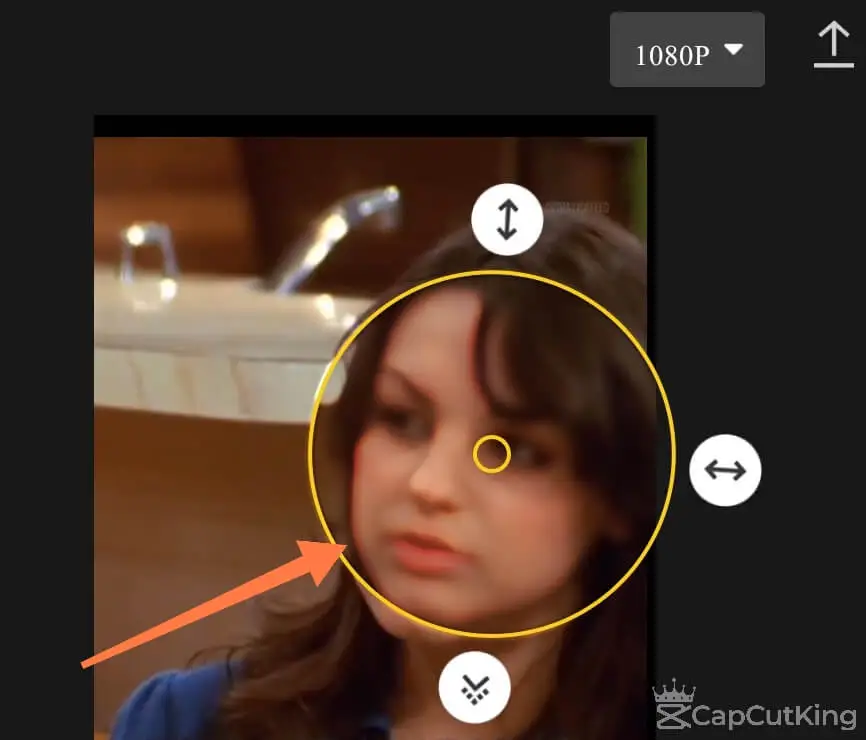
27. Play the video again to make sure you have blurred the required thing.
28. Download the video from the upper right ‘Download’ option and get it in your Gallery to share.
You have seen that it is so simple to blur any object in video. In fact, it is just a matter of a few steps to blur on capcut. Here it is important to note that the blur effect applied here is only for a still object. If the object is moving it will no longer be blurry outside the selected ‘Mask’ area.
For moving objects, you will have to add keyframes by marking new frames. Keyframe can be located near the play button. After you have marked the new moving section with a keyframe, add the ‘Mask’ tool and repeat the above mentioned steps. The process needs close attention in marking keyframes and it can be time-consuming. But a little effort can result in an excellent result.
How to unblur only a part of video in CapCut?
Editing some of the videos you only want to focus on someone’s face or a promotional product and blur the surrounding. With CapCut you can do the exact thing quickly. In fact, the process is exactly similar to the previous one of blurring an object except for one step.
Here is how you can focus on a person’s face and blur the surrounding.
After opening CapCut App, ‘Add’ the video from your gallery.
1. Navigate the ‘Overlay’ and tap on it. You can locate it near ‘Effects.’
2. ‘Add Overlay’ and it will take you to the Gallery. Choose the same video from the gallery again.
3. Move back to the editing panel. Select ‘Effects’ and then ‘Video Effects.’
4. From the ‘Basic’ effects category select the ‘blur’ effect and drag the right handlebar to the required duration.
5. Tune the intensity of effect from the ‘Adjust’ option.
6. Hit the ‘Object’ on the bottom where here it will ask you for object video.
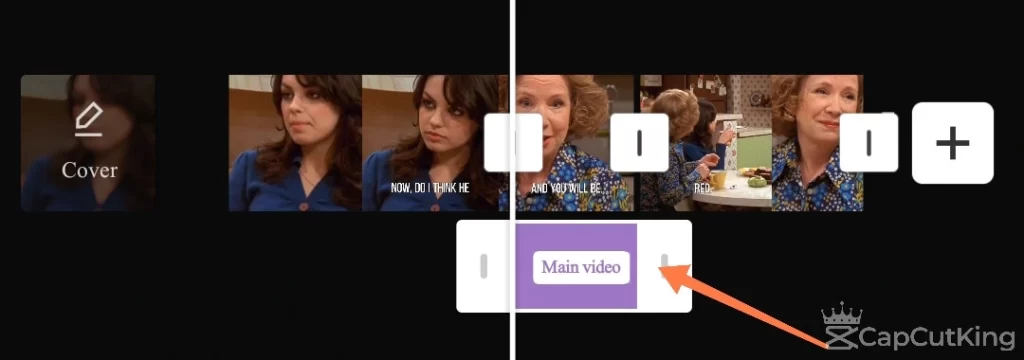
7. Select ‘Main Video’ as an object.
We selected ‘overlay video’ as ‘Object’ to blur any object. But to blur the border, we will select ‘Main Video’ as an object.
8. Go back and choose ‘Overlay’.
9. After sliding left the options you will navigate ‘Mask’.
10. Select the shape according to the face or object you want to put in focus.
11. Position the selected ‘Mask’ shape on the face or object you want to keep in focus and the surrounding will be blurred.
12. Play the video again to make sure the video meets your requirements.
13. Download the video from the upper right ‘Download’ option and get it in your Gallery to share.
It is that much easier to blut on capcut. Using CapCut you can easily blur complete video, a part of it, or any object in it.
How to blur the border of a video on Capcut?
Sometimes you may not get satisfied with background graphics in a video or want to clearly focus on the object and feel the need to blur the background. CapCut is here with the solution. Blurring the background in a video used to be a hectic job but CapCut made it just a matter of a few steps.
Follow this step to step guide to blur the background in a video quickly.
1. Start ‘New Project’ and ‘Add’ video from the gallery.
2. Find ‘Canvas’ on the editing panel and tap on it.
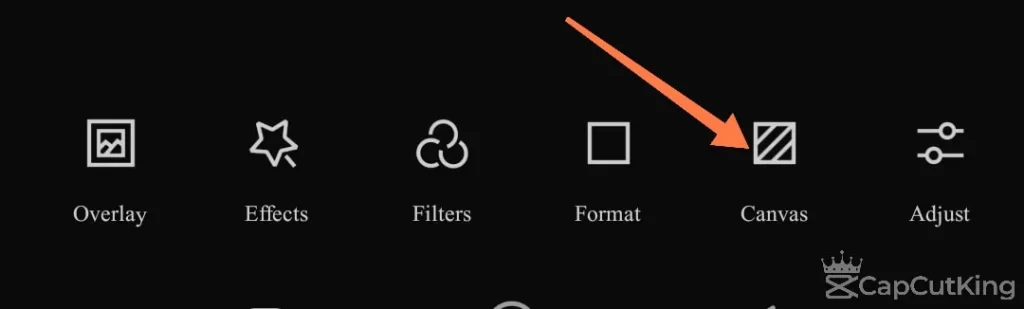
3. Hit the ‘Blur’ from the options.

4. Some background blurring options will show up on the screen. Choose the one of your need.
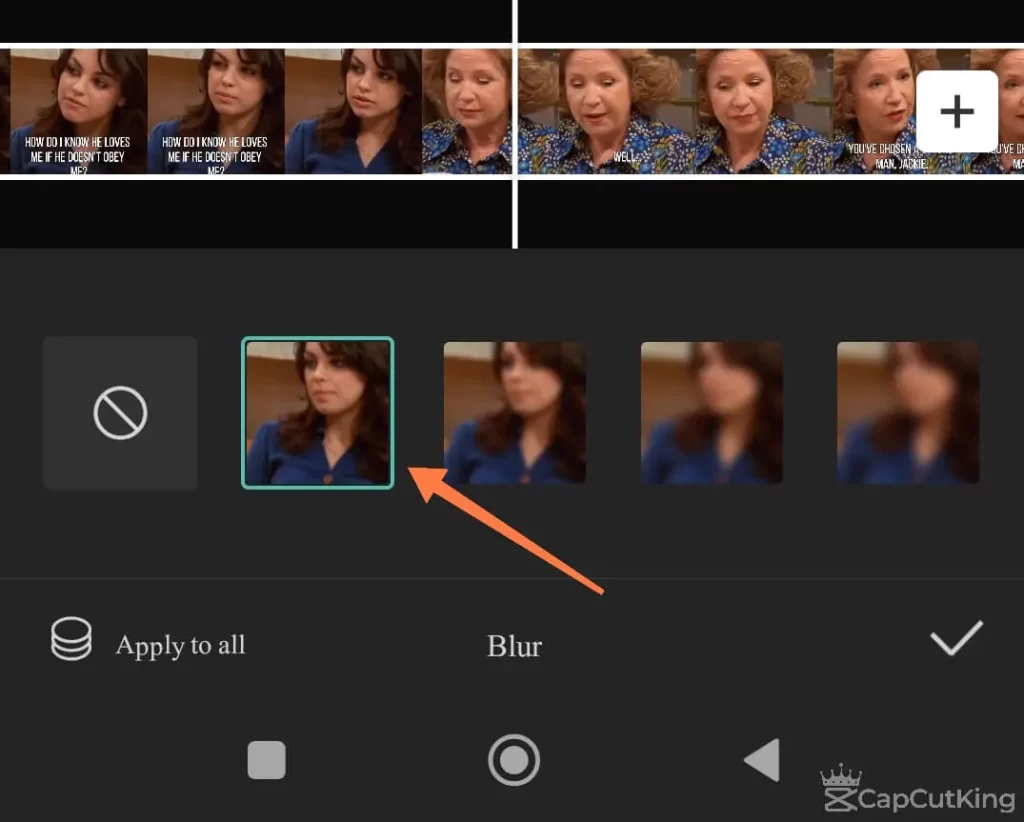
5. After the blur effect is added, use your both fingers to resize the video and position the area that you want to keep clear. As you can see in the image below, a blurred border / background has been added to the video.
6. Take a final look at the video and export it from the upper right ‘Download’ Option.
Done! How easily you can blur on capcut, be it border, object or the complete video!
How to Use Motion Blur on CapCut?
Motion blur is used to give the video a real touch. For a moving object motion, blur gives realism. For pictures, motion blurs give smooths transitions. A CapCut motion blur is a creative tool that gives videos a real touch after editing.
Here is how you can add motion blur in your video.
1. Launch CapCut app and ‘Add’ video.
2. From the editing workplace go to ‘Effects’
3. Select the ‘Basic’ effects category. Here you will find ‘Motion Blur’ among other blurring effects.
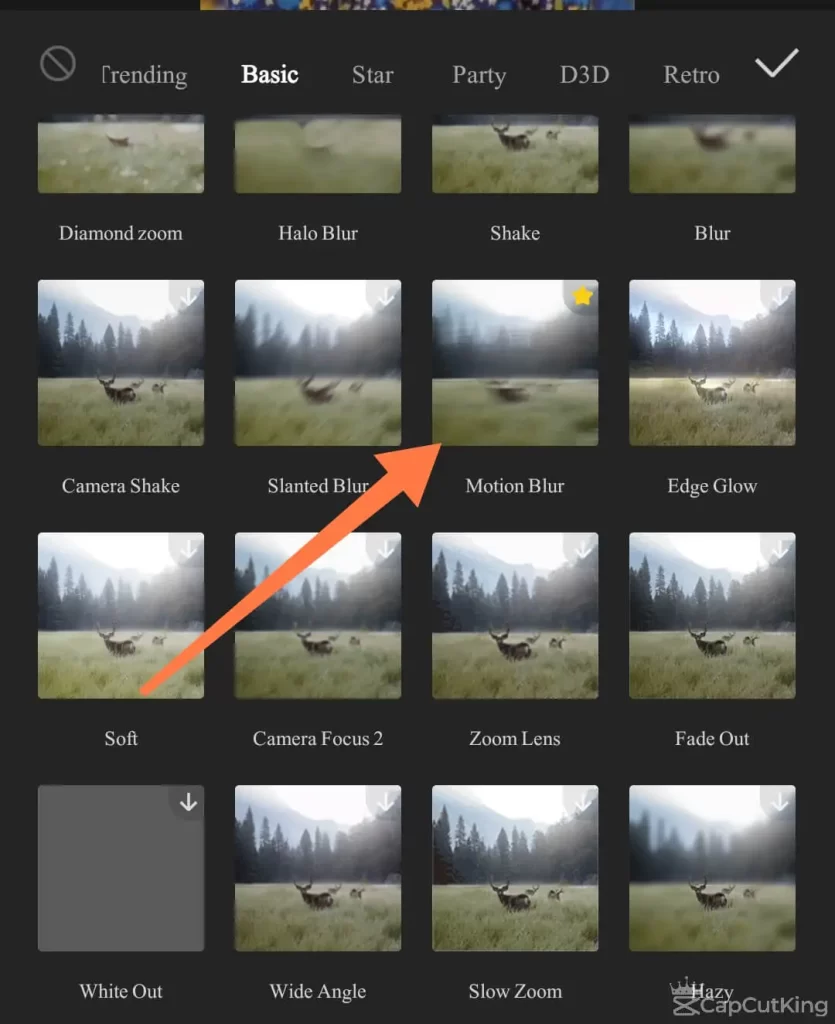
4. Tap ‘Motion Blur’ and drag the slider to complete video duration.
5. Adjust the intensity as well as the dimension of Motion effect.
6. Press ‘play’ button to check the final touch.
7. Export video into your gallery and share it with your friends.
Using Motion Blur effect in CapCut is very easy.
Frequently Asked Question
We have tried to answer some FAQs about how to blur in CapCut.
Final Verdict
We have summed up entire process to blur on CapCut. And by now you would have known everything about blurring videos, objects and background. Now is the time to practice and share your creativity with world.